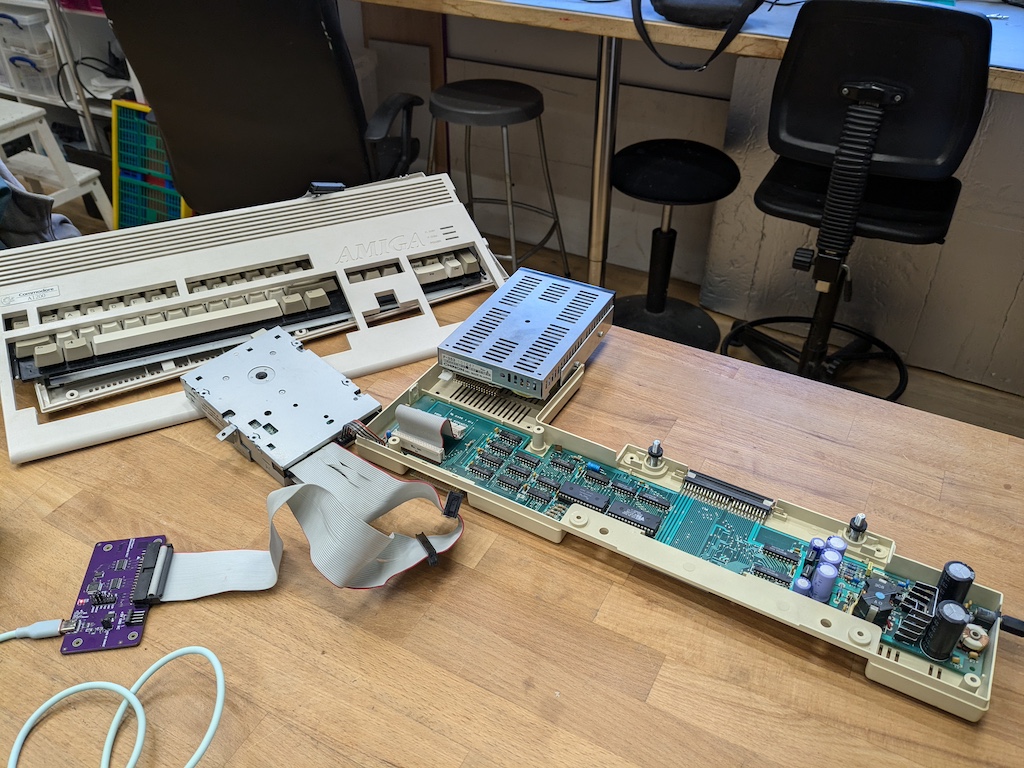
I was recently asked by a neighbour if I could help reading some computer floppy disks from the 1980s which contained long-lost data from laboratory experiments. They were interested in re-interpreting some of this data and so were eager to see if the data could be recovered. This sounded like an interesting challenge, so I was ready to give it a try.
Once again, this post probably gets quite technical so do forgive me.
The process to read old disks genererally goes something like:
- Find something that can read the disks and clean the dust off it. Work out a way of transferring the data to a modern computer.
- Transfer the data from the disk to the computer.
- Try to figure out what the information on the disk means.
- Profit!
Step 1: find some 1980s hardware
In the 1970s and 1980s floppy disks weren't standardised and so generally weren't interchangeable. Because floppy disks transferred the data very quickly (at the time) software couldn't keep up reading. Most computers used complex specialised hardware disk controller chips to encode and decode the data. Commodore developed a whole computer to run inside their disk drive to encode the data, but Steve Wozniak went the other way and developed an elegant disk controller in only 8 chips. All these different ways meant you generally had to use a Commodore computer to read a Commodore disk, or an Apple computer to read an Apple disk, or an Acorn drive to...you get the idea.
I had a hunt around the store-room of the Edinburgh Hacklab and found a disk drive. All that was needed was to find a computer that had an interface card to talk to the drive. Get it out of the store, plug it in, transfer the data and all done. Easy.
Except...we didn't know what was on the disks and therefore which type of computer we would need. Worse: all computers of a suitable age had been discarded in the recent lab clear-out. A problem! (And a lesson - always hoard old junk).
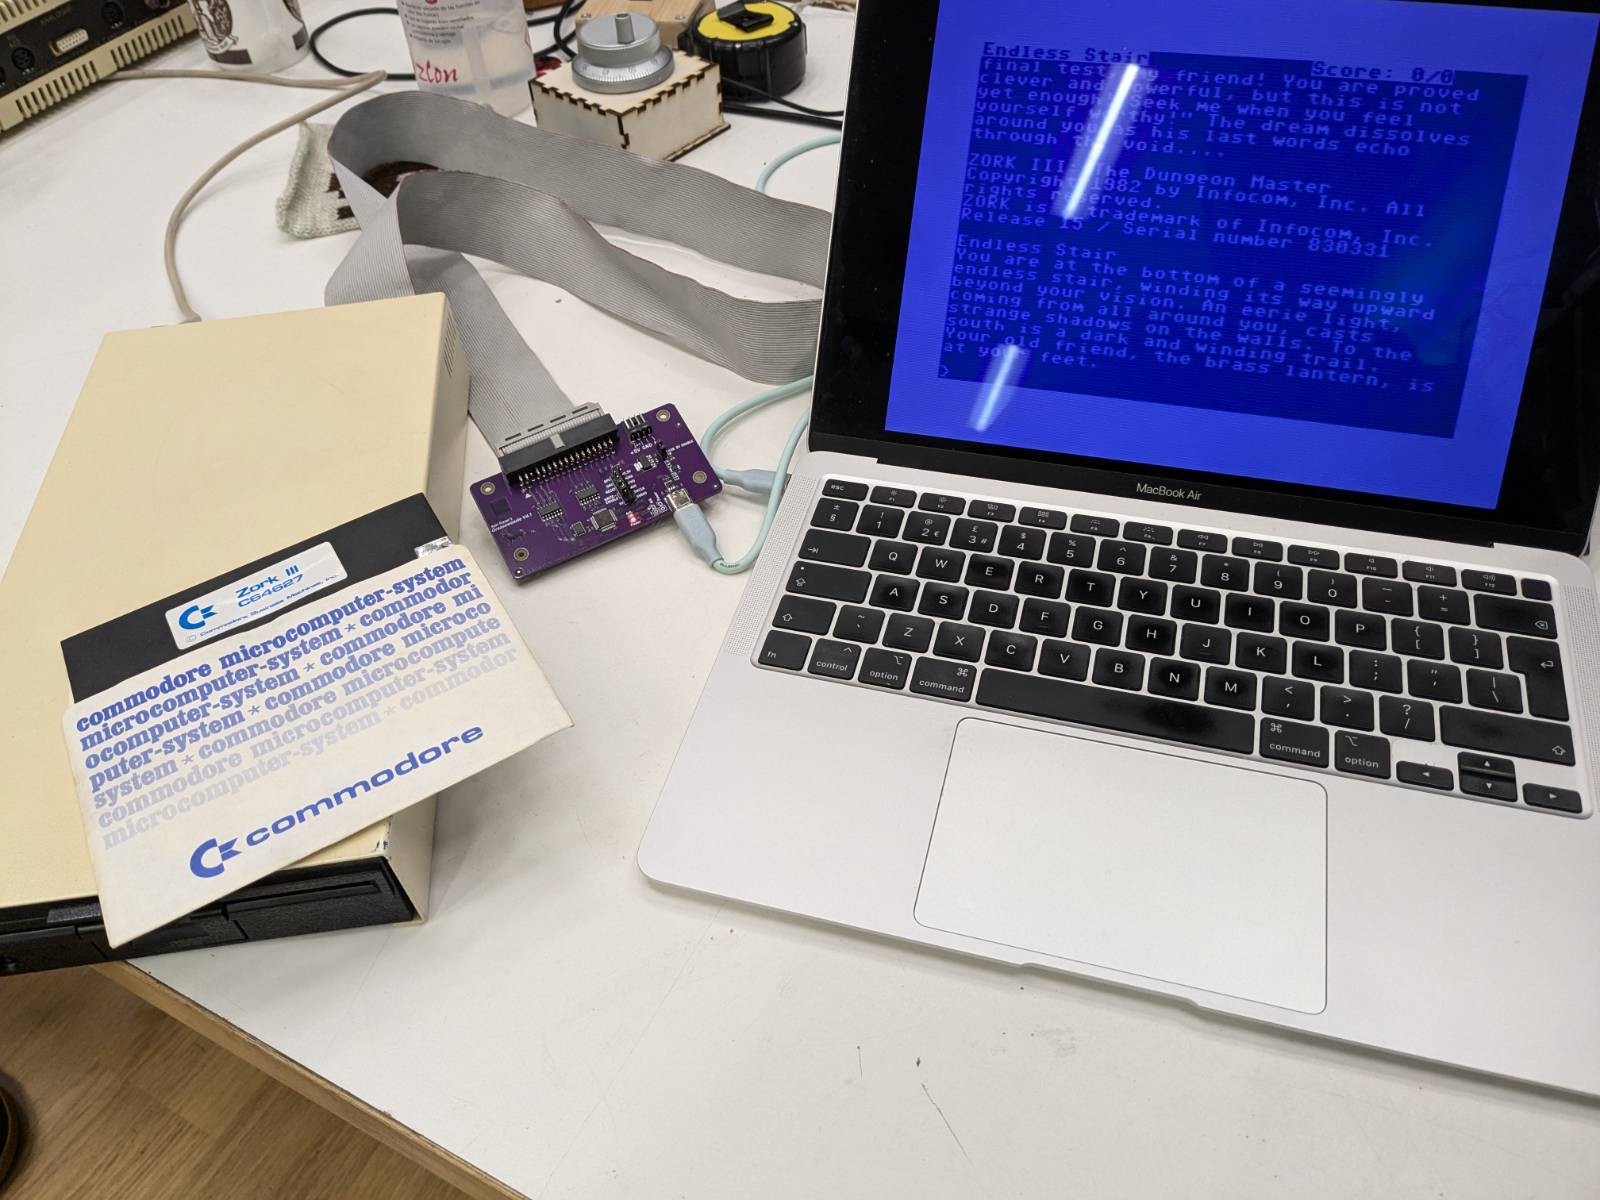
Fortunately there are some modern tools that help. One of these is the Greaseweazle which is a neat little thing. One end has a connector for a floppy disc drive and the other end has a USB-C connector which plugged into my modern Macbook Air. I ordered one and a couple of days later I was ready to go. The software was installed via the Python package tool "pip".
The greaseweazle is able to read all kinds of disks which means you can break the old rules - here is a photo of my Apple computer using an Acorn disk drive to read a Commodore disk. This would have been heresy in 1984.
How is data encoded onto a disk?
The disk is made of a circular piece of magnetic material coated onto flexible plastic. If you had a super-power of being able to see magnetism you could look at a disk and it would look something like this:
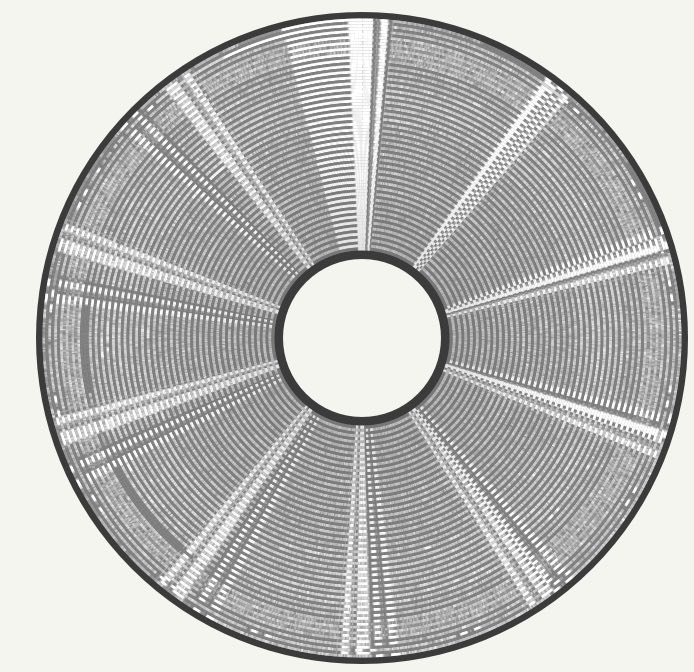
It might be possible to see parts that look like cake-slices (known in the lingo as "sectors") and circles (known as "tracks").
- The data is represented as a file. This could be a word processor document file, a spreadsheet file, or something else in a custom encoding.
- The file is split up into blocks of around 256 bytes of data.
- The disk is split into around 40-80 tracks.
- Each track is divided into about 10-20 sectors/cake slices. Each of these track/sector pieces is big enough to hold one of the blocks of data from step 2.
- The computer finds tracks and sectors which don't already have data stored on them. If there aren't any then the disk is full and can't store any more data.
- It writes each block of data to the disk along with extra information to help it determine which sector and track is which. It updates a "catalogue" on the disk to help it remember where each file is stored, and which parts of the disk are used and which parts are free to store further data.
- The disk drive passes current through a "write head" which touches the disk surface. This magnetises the particles in the magnetic material on the disk.
It might be possible to see that some sectors are patterned in the image above. These patterns are the actual chopped-up files stored on the disk.
Step 2: Transfer the data to a modern computer.
The first step is to read the raw magnetic flux transitions from the disk. What are magnetic flux transitions? Wikipedia explains. "In physics, specifically electromagnetism, the magnetic flux through a surface is the surface integral of the normal component of the magnetic field B over that surface. It is usually denoted Φ or ΦB."
Fortunately we are archaeologists today rather than physicists so we can ignore that definition. As the disk rotates past the disk drive read head(s) a voltage is induced which corresponds to the magnetic data on disk and the drive sends these readings straight to the computer. This way we can read a disk without worrying what's on it - if it is an IBM disk or a Commodore disk they are all read the same. Any errors or imperfections are also transferred, allowing us to inspect them and potentially recover bad data if we're lucky.
This can be done from the command line via:
gw read <name>.scp --drive 0 --tracks="c=0-79:h=0,1" --adjust-speed=300rpm
This produces what is called a "raw disk image". The disk drive will click as the read head moves across the tracks and a minute or so later the data will have read.
Step 3: Try to figure out what the information on the disk means
We need to figure out how the magnetic information in the raw image represents sectors and tracks and ultimately files and data that we can do useful things with.
There are various tools to help with this. I've got an MacOS computer and so found the Applesauce tool. You can load the .scp file into this tool and it produces a really nice visualistion of the disk. (I used it to produce the image above).
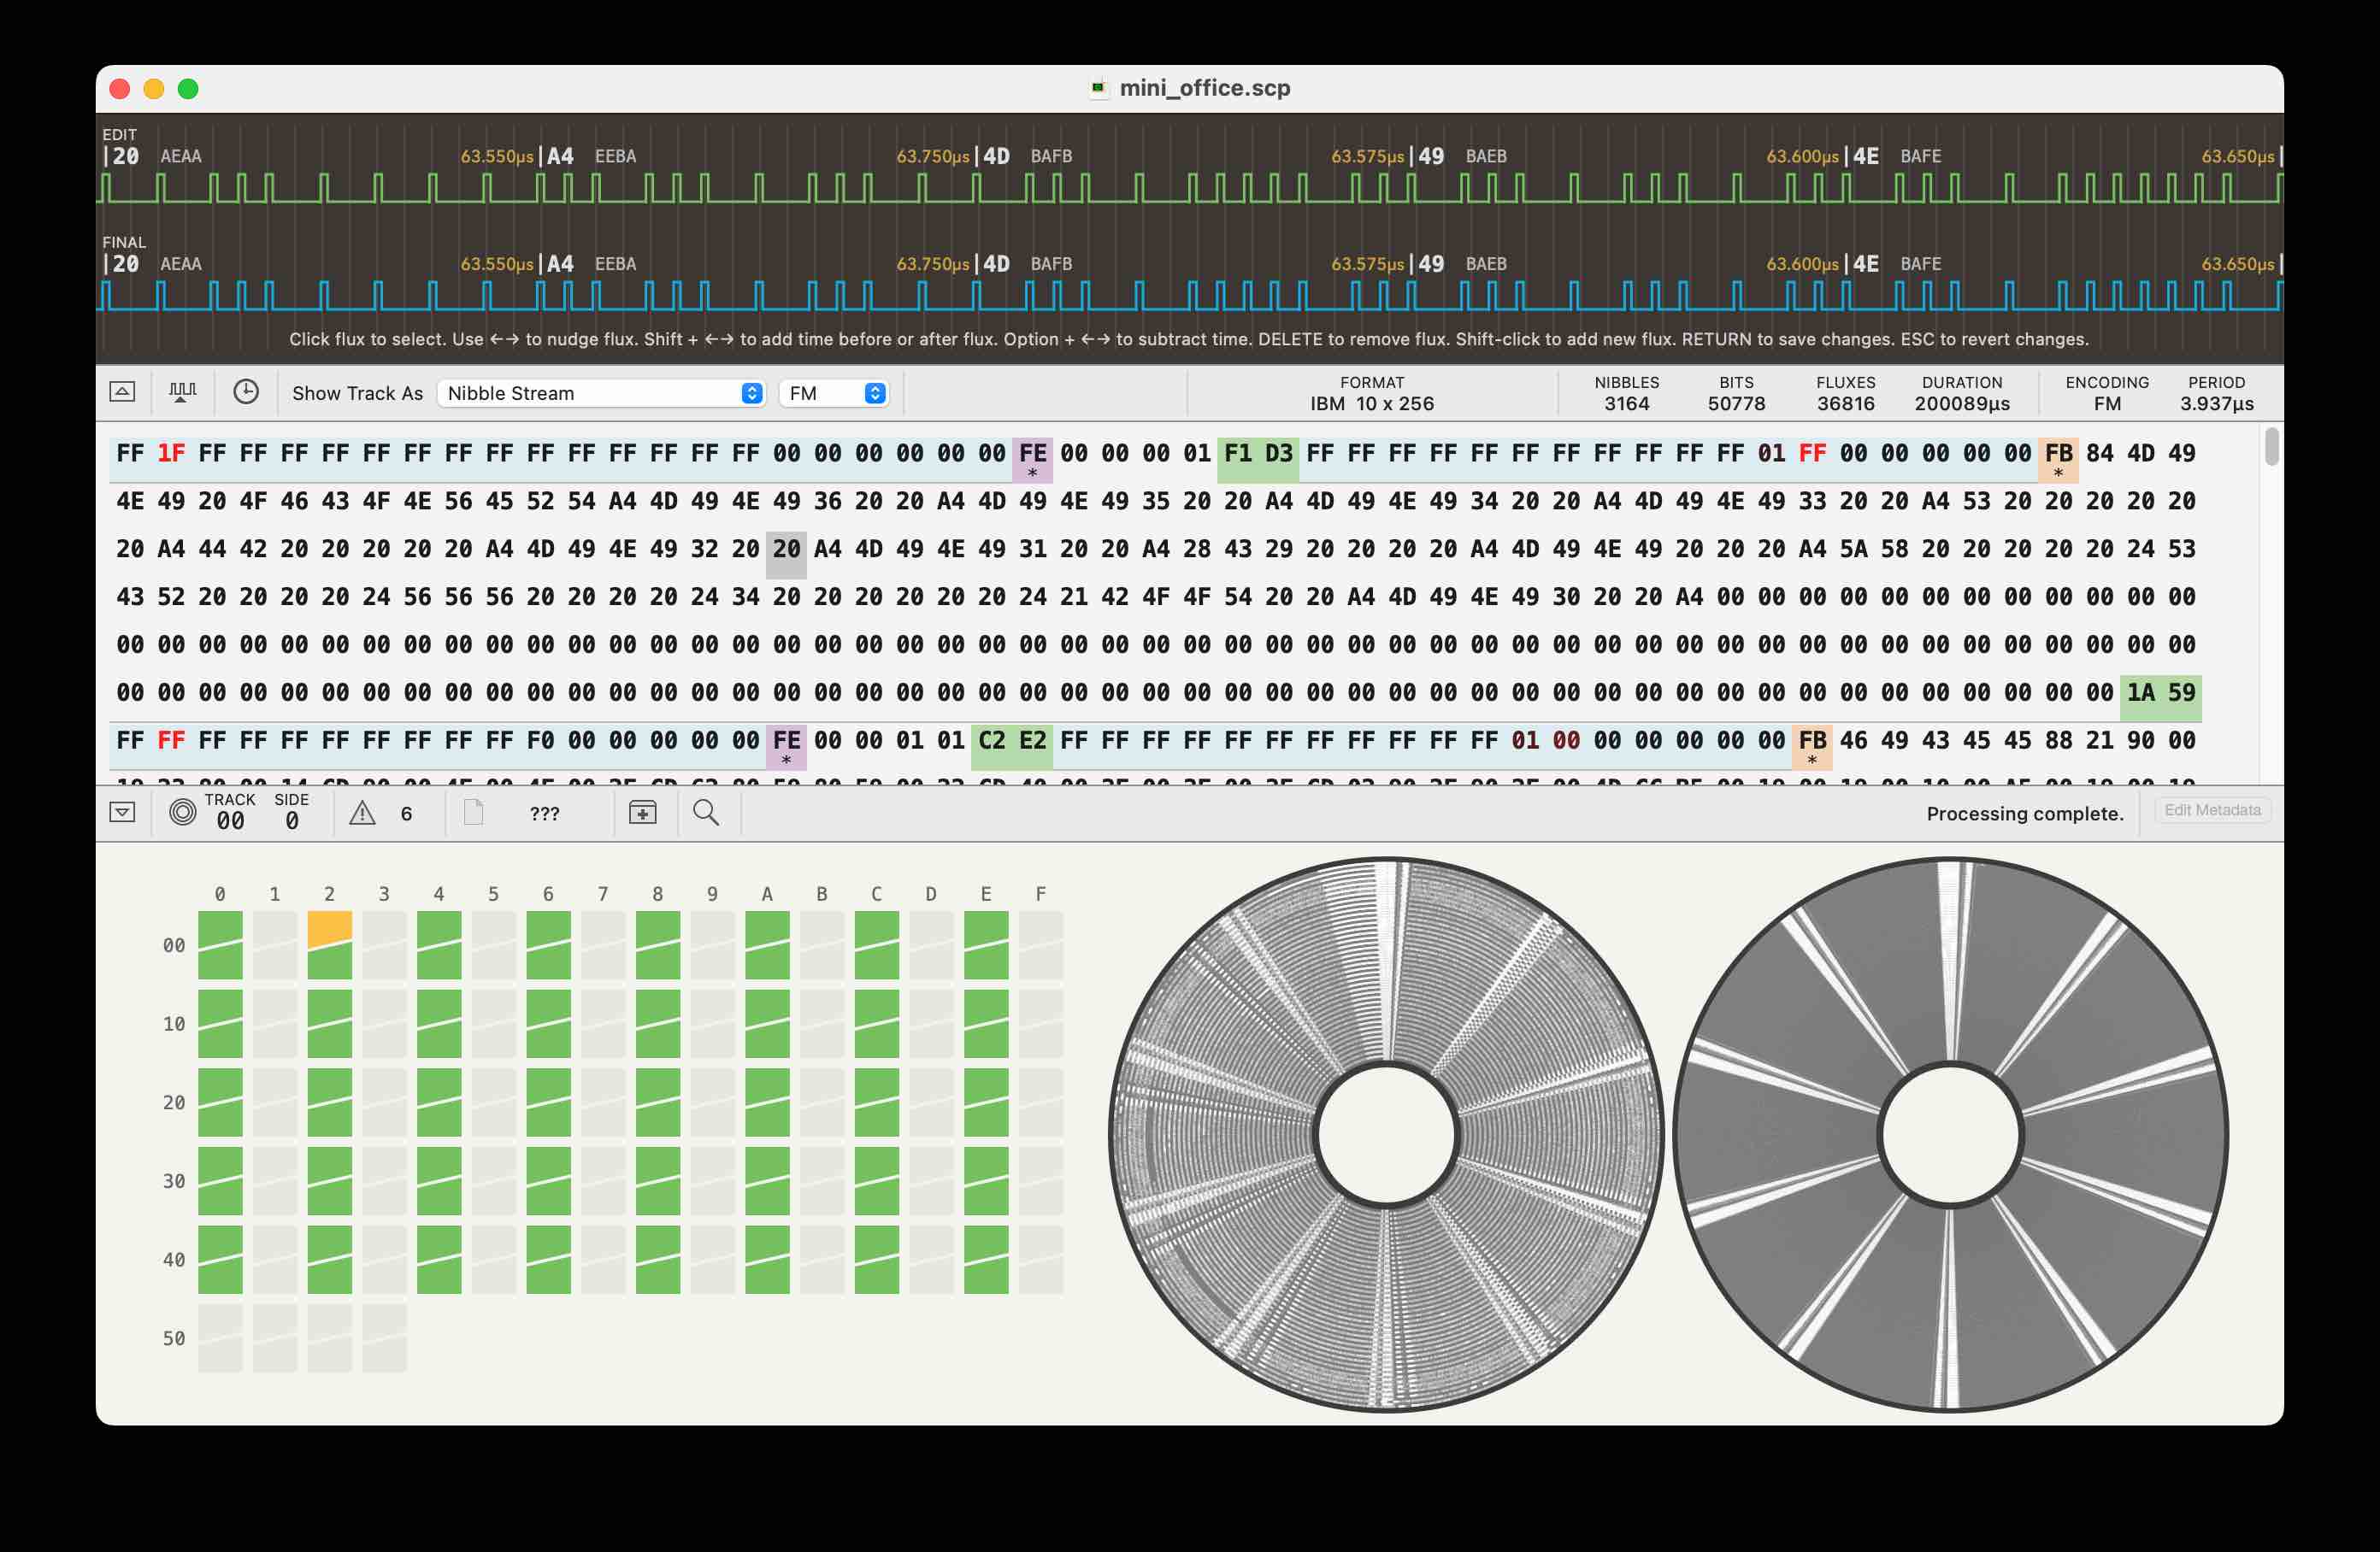
This is a great tool for showing everything about the disk - even down to the magnetic flux transition pulses shown in blue and green at the top. It shows which parts of the disk are good - one sector has an error on this disk, as shown by the yellow square amongst all the green ones.
It also gives clues to the computer used to write the disk. Different techniques were developed to turn the pulses into bytes of data. Commodore and Apple used a method known as Group coded recording. Acorn used FM encoding in their "Disk Filing System" but the improved MFM encoding was used in the later "Advanced Disk Filing System" and in the IBM PC. It figures out which encoding was used (and hence narrows down the kind of computer), which is very helpful in guessing how to decode the disk.
The "catalogue" of the disk is also stored in different places. Many computers stored this in track 0 at the edge of the disk but Commodore used a track in the middle. This might be visible.
Applesauce can show the timing of the flux transitions. This picture is from a reasonably good disk and is a visualisation of one track. You might be able to see how the top line is divided into blocks - each of these is a sector. There are gaps between the sectors to cater for speed variations between the drives. If there were no gaps a slow drive might accidentally write over the next sector.

One of the disks just wouldn't read. I don't know what had happened, but compare the timing diagram to the good one and I can understand why it's hard to decode: something goes very wrong in the middle.

It's also interesting to look at the visualisation for this disk. It looks as though perhaps some of the magnetic particles have flaked off in parts:
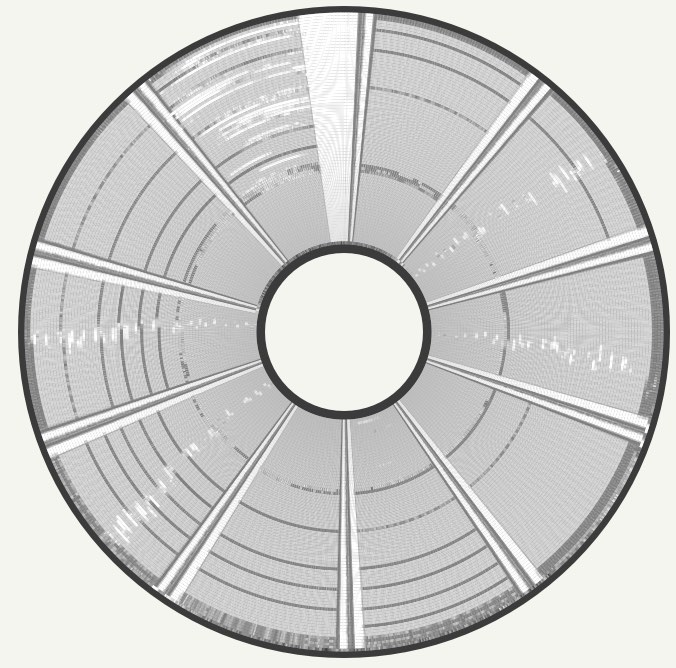
We decided that the data on this disk was unfortunately not recoverable. Fortunately most disks were OK even after around 40 years of storage.
Step 3b: Convert the raw image into a computer-specific filesystem image
The raw image contains data at a level which isn't easy to read. Emulators or further decoding tools like to work at the level of tracks and sectors rather than raw magnetic flux transitions.
Ad-hoc standards exist for this kind of data, but they are specific to each type of computer. Fortunately the greaseweazle tools can convert the SCP file we have so far into a computer specific image.
We knew that the discs were likely recorded using a BBC Micro or an IBM PC.
We knew we had FM encoded disks, so figured they were likely the BBC Micro ones. We tried to convert the file. The Greaseweazle tools are clever and determine which conversion to use based on the file extension. "SSD" is an image for Acorn single sided disks, so it was worth a go:
gw convert --tracks=step=2 experiments_disk3.scp disk3.ssd
The conversion gave some encouraging messages:
Converting c=0-39:h=0:step=2 -> c=0-39:h=0
Format acorn.dfs.ss
T0.0: IBM FM (9/10 sectors) from Raw Flux (97884 flux in 600.00ms)
T1.0 <- Image 2.0: IBM FM (10/10 sectors) from Raw Flux (104274 flux in 600.00ms)
T2.0 <- Image 4.0: IBM FM (10/10 sectors) from Raw Flux (115338 flux in 600.00ms)
Cyl-> 0         1         2         3
H. S: 0123456789012345678901234567890123456789
0. 0: ........................................
0. 1: ........................................
0. 2: ........................................
0. 3: ........................................
0. 4: ........................................
0. 5: ........................................
0. 6: ........................................
0. 7: ........................................
0. 8: ........................................
0. 9: ........................................
Found 400 sectors of 400 (100%)
If you get the image type wrong it spits out tons of errors, giving you the hint.
(Note to future self: Commodore 64 and PET disks can be converted using the .d64 extension)
Once the disk is understood and the format known the disk can be read and converted in one step using commands such as:
gw read --drive 0 bbc_80tracks.ssd
or
gw read --drive 0 --tracks=step=2 bbc_40tracks.ssd
Step 3c: Using the converted image in an emulator
I did some poking at the converted file and there were clues that it was a BBC Micro disk image.
There is an online BBC Micro emulator known as jsbeeb which can read images. The "Discs" menu lets you load the SSD file that we just converted.
IT WORKED! YAY! We can see some files!
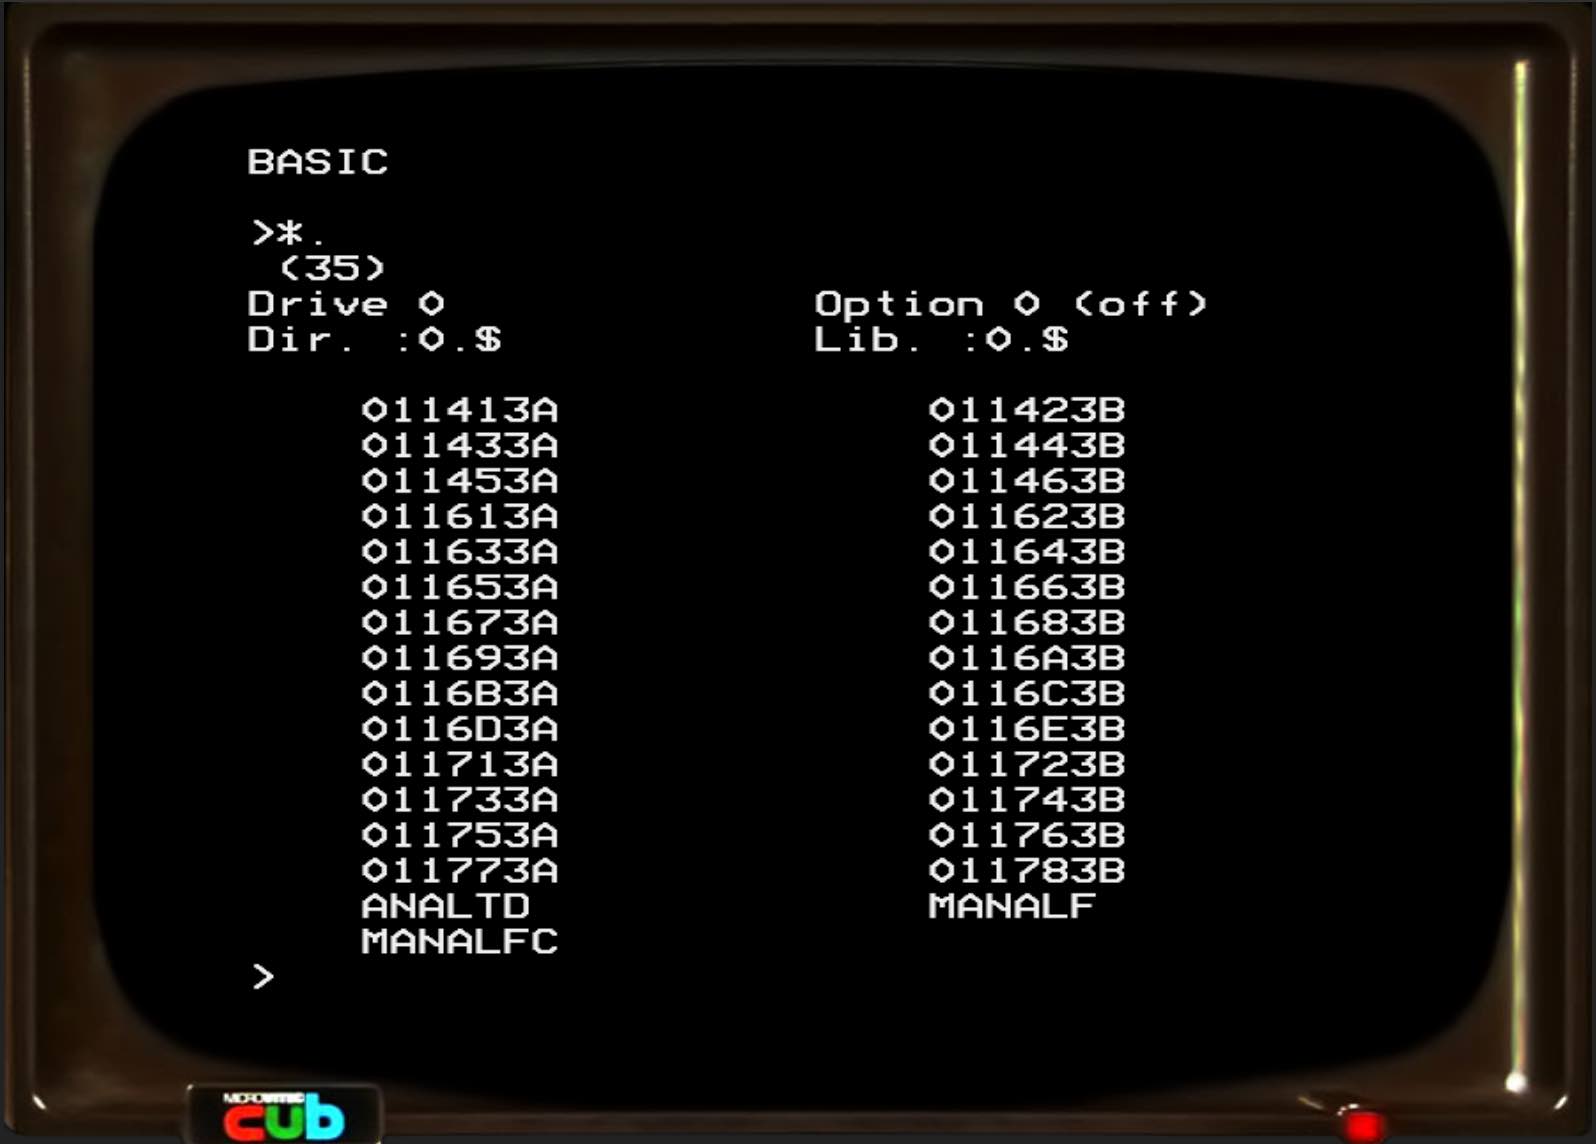
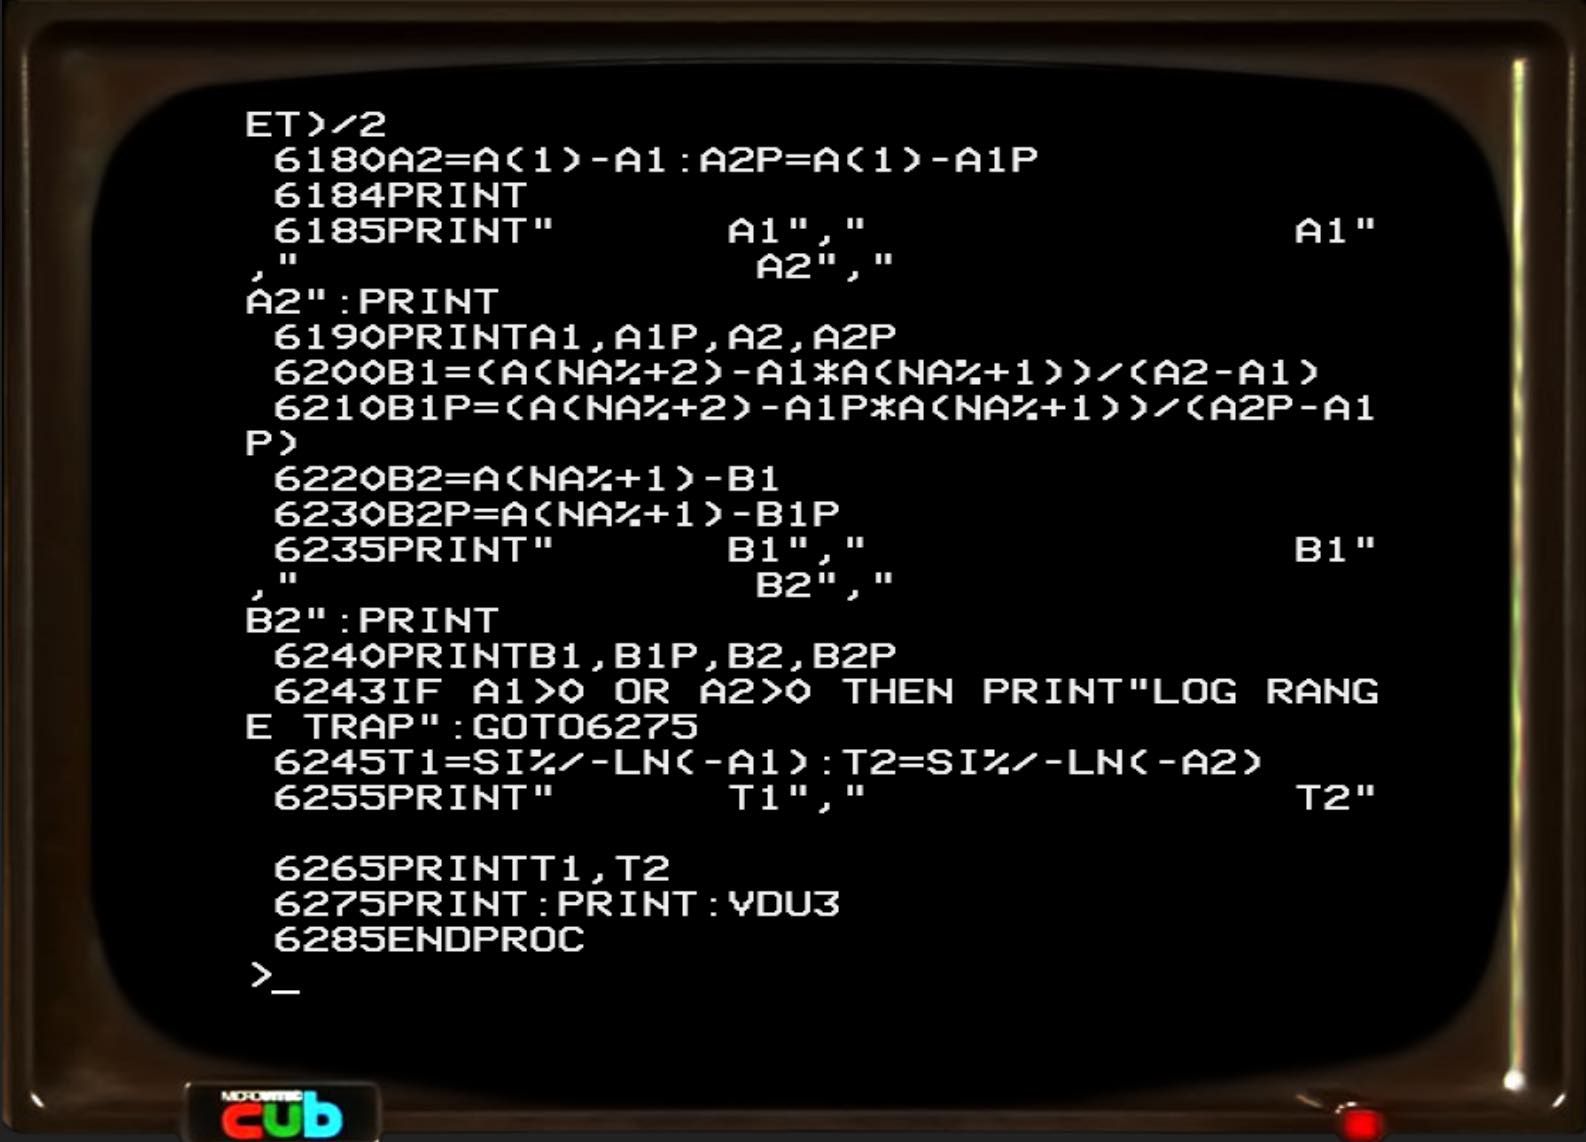
Even better, we can load a BASIC program from the disk and run it!
Step 3d: Extracting the files to a modern filesystem
For some usages the emulator might be enough. We wanted to extract the data for further use however.
Fortunately there are two useful programs for BBC Micro images:
MMB Utils takes an SSD or similar image file and outputs single files in a directory:
BBC_Micro_tools/MMB_Utils/beeb getfile disk3.ssd disk3_files
basictool takes a basic program from the step above and turns it into readable text:
BBC_Micro_tools/basictool/basictool <basic file> basic_file.txt
(For Commodore disks the c1541 tool from the "VICE" Commodore emulator can do this, and bastext can convert Commodore BASIC files.)
How to extract the experiment data?
Most of the disks contained the results of laboratory experiments. This data was logged by a long-gone 1980s data logger. I was on my own from now on with no off-the-shelf tools...
Detective attempt 1: Look for clues with a hex editor
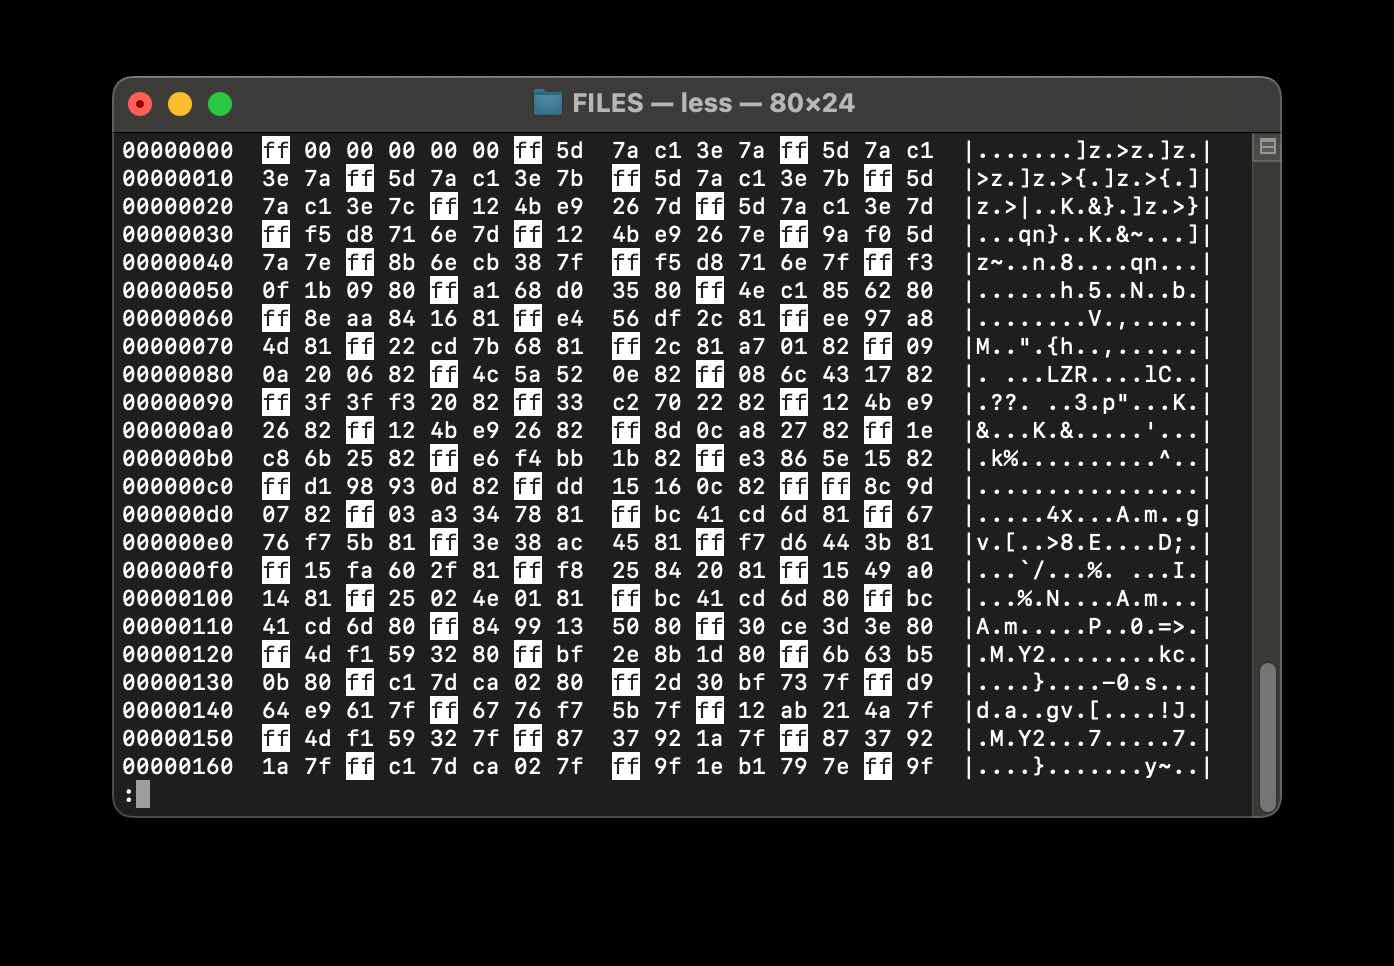
This gave some good clues. We knew the file would have some repeated readings, and an examination of the file showed a repeating pattern of 0xff followed by 5 bytes. The 5 bytes looked roughly similar which was a good sign too. But what did the 5 bytes mean? And did the 0xff signify something? I tried searching online but sadly the search engines only returned Spam. I'm sure this stuff is documented somewhere...but I couldn't find it.
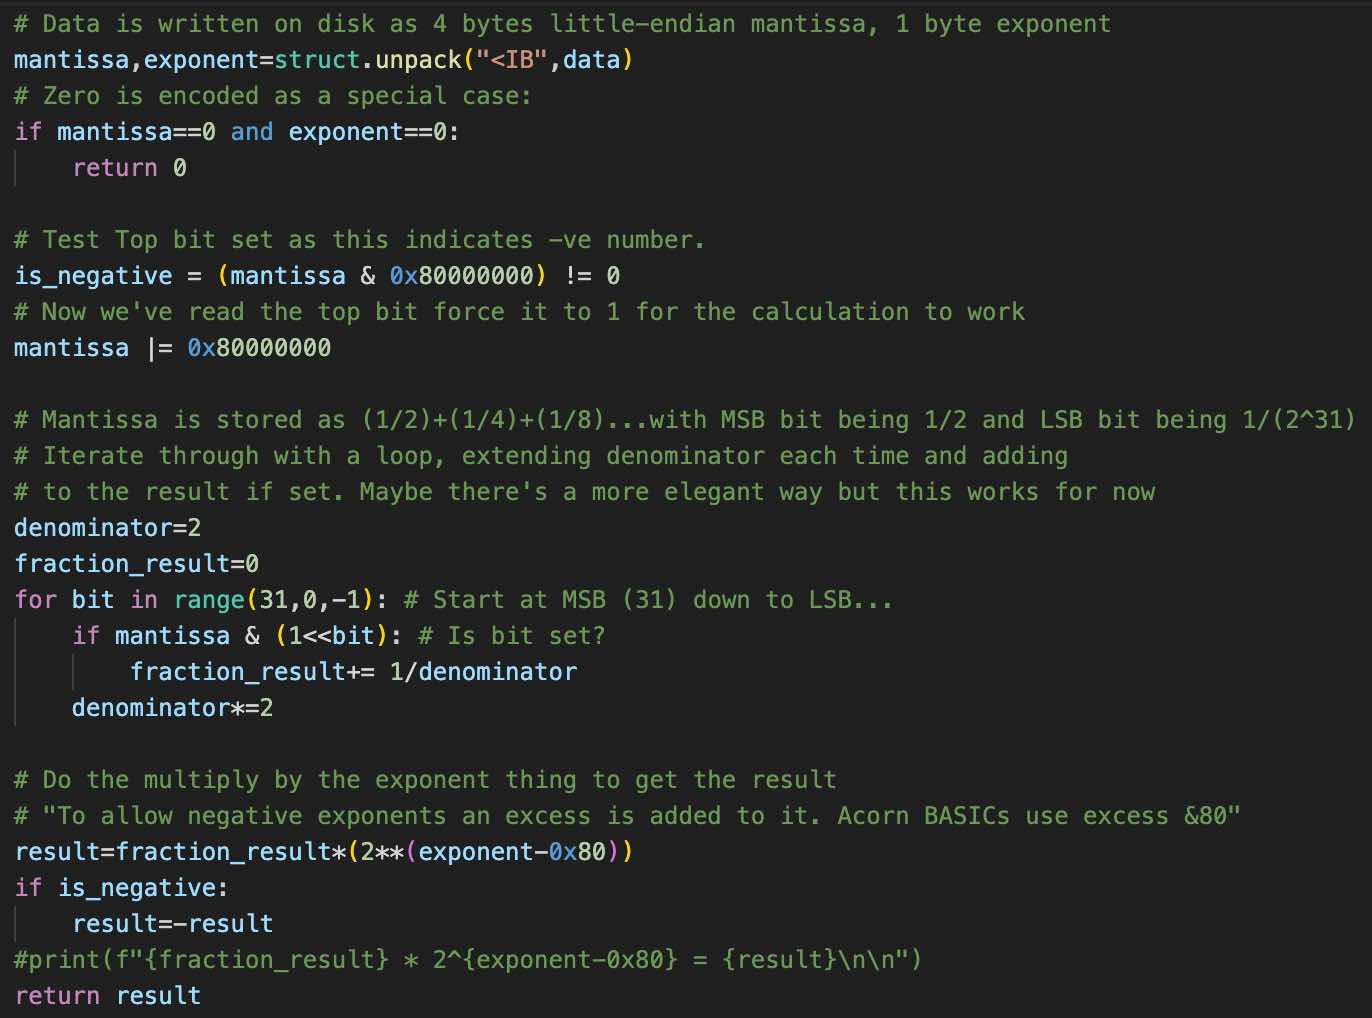
The data didn't look as though it was encoded as integers. So floating point readings perhaps? An more successful search showed that BBC BASIC encoded floating point numbers as 5 bytes. This sounds plausible! I wrote some Python code to try and explore this idea but the numbers output didn't make sense. Hmm.
I did an experiment using the emulator (left) to write files, and looked at their hex representation (right):

This was really helpful as it showed how the data was encoded as I could tie it up with the examples I had found online. I wrote some slighly hacky quick Python code and tests to check against the data I knew about from my tests:
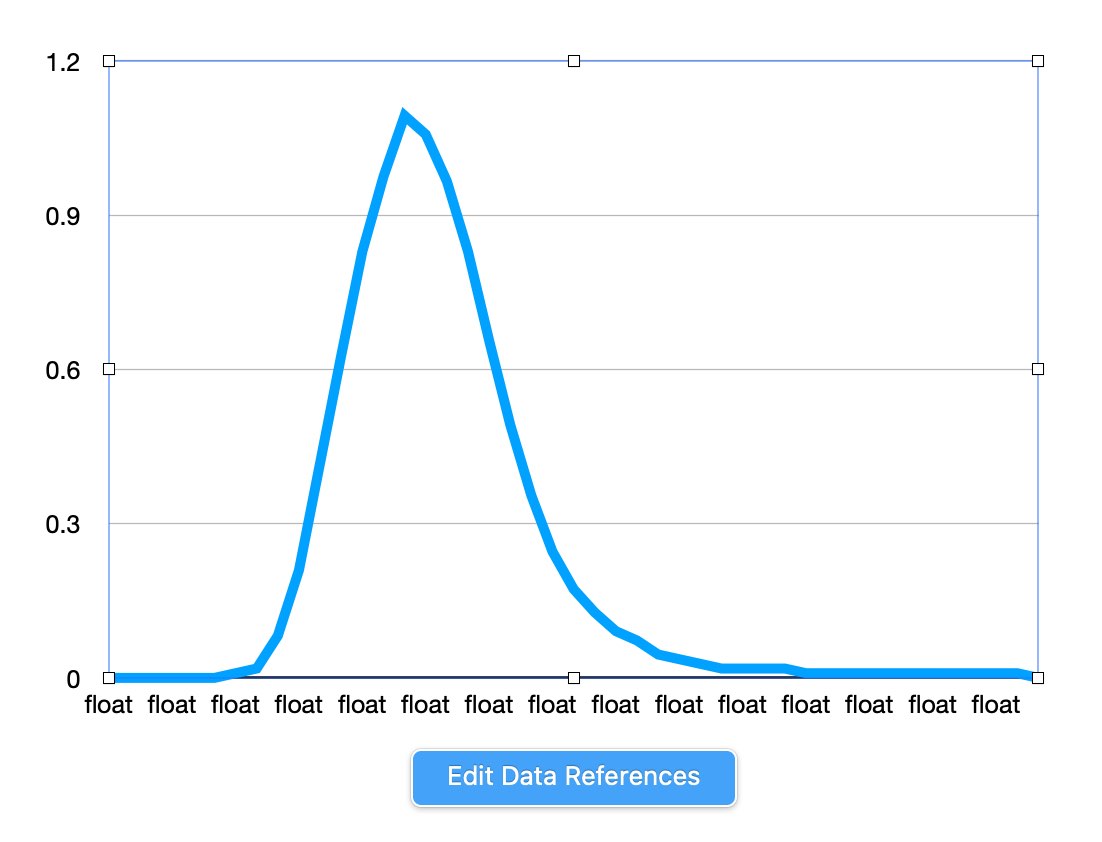
I ran it on one of the files. I plotted the results as a spreadsheet chart to see if it looked plausible. And it was the expected shape. This looks promising!
I extended this Python script to also decode integers (Indicated by 0x40 followed by a 4 byte big-endian integer) and strings (Indicated by 0x00 followed by the string length followed by the reversed(!) string).
It output 290 CSV files ready for further analysis....
Conclusion
This was an interesting project. It involved going from working at a low level through to reverse engineering a file format and writing a decoder for it.
Greaseweazle and Applesauce are impressive tools, and it's great that there are various open source decoding tools out there.
The disks had largely lasted well, but some had failed. It's probably as well we got the data from them now as who knows how long they will last.
Digital preservation looks to still a bit of an art, with each disk having to be considered on a case by case basis.
It also helps to have a local Hacklab with some retro computers that can be taken apart for disk drives and power supplies and such! In this case an Commodore Amiga 1200 provided a dual sided disk drive, powered from an Acorn Electron "Plus 3" expansion. It turned out this only had a single sided drive, hence requiring a donor Amiga for further parts...
