
My partner was inspired by some of the knitted creations of Madeleine Shepherd who has made some really interesting things - such as a knitted Laika dog, Ada Lovelace wall hangings and cellular automata knitting. She enjoyed a machine knitting class which was run at the Edinburgh Remakery, but then found hand knitting tedious after the speed of a machine.
This lead her to recently buy a Brother KH-910 knitting machine which was modified to include an Arduino with the AYAB shield. This allows the machine to download patterns from a computer and knit them.
She was browsing eBay and was surprised to see the pattern of her favourite childhood jumper on the cover of a pattern book...
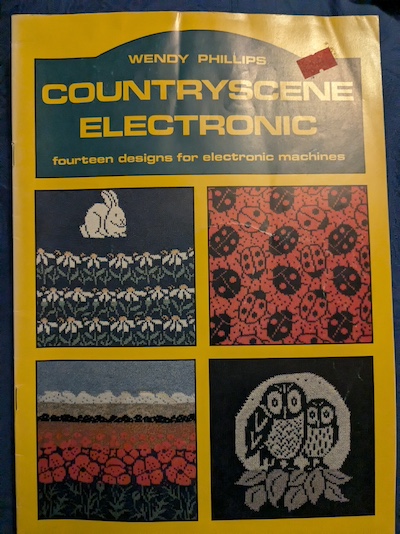
...which was quickly bought too. Wendy Phillips - in the unlikely case you read this - be glad to know your designs are still being read all these years later.
Life was hard in the 1980s, but modern computers let us make it harder.
The original machines of the time used punched cards to know what to knit. You would take the pattern and manually punch out holes to match. If the pattern had a hole the machine would knit one colour; if no hole it would knit the other.
But that was the 1980s - and in 2024 we live in the future where we have computers with cameras. So why quickly punch out a card when I could take much longer writing a computer program to do it?
So yesterday, after a walk in the hot Scottish summer, an idea was born. We need a new thick woolly jumper to fend off this Scottish summer July "heat", and we need it tomorrow!
What does AYAB take as input?
Instead of using punched cards, AYAB accepts monochrome .png files. Much like the punched cards, a white pixel means knit with the main yarn, while a black pixel knits a stich with the second yarn - so having a different colour.
So, if I could take a photo of the pattern and convert it into a monochrome image we'd have what we'd need. Easy.
Holding the camera just right.
There are three things that need to be overcome:
- The book has a lot of writing and space around the image that we want to discard.
- It's really hard to get a square image from a phone - there is usually some distortion from holding the phone at an angle away from the page.
- The grid lines in the image need to be removed.
Step 1 - Find the corners of the image.
There are many example techniques for doing this online, but none of them worked reliably. This is a project that was supposed to be quick, so I decided upon a pragmatic solution - helping the machine by manually highlighting the edges if required.
- I initially used OpenCV's Harris Corner detection. This finds all corners in the image, so the list of corners is then processed to find the outermost ones. This was fine if the image was cropped closely, and I was pleased.
- I tried with some of the larger assets, but it wasn't so good as it tended to identify corners on the surrounding writing. So a quick solution was to help it by manually drawing red lines to show the outer lines of the grid.
This worked pretty well - and if I say I got an AI to do it for me I sound even more clever. Here, my artificial brain shows you what it has found:
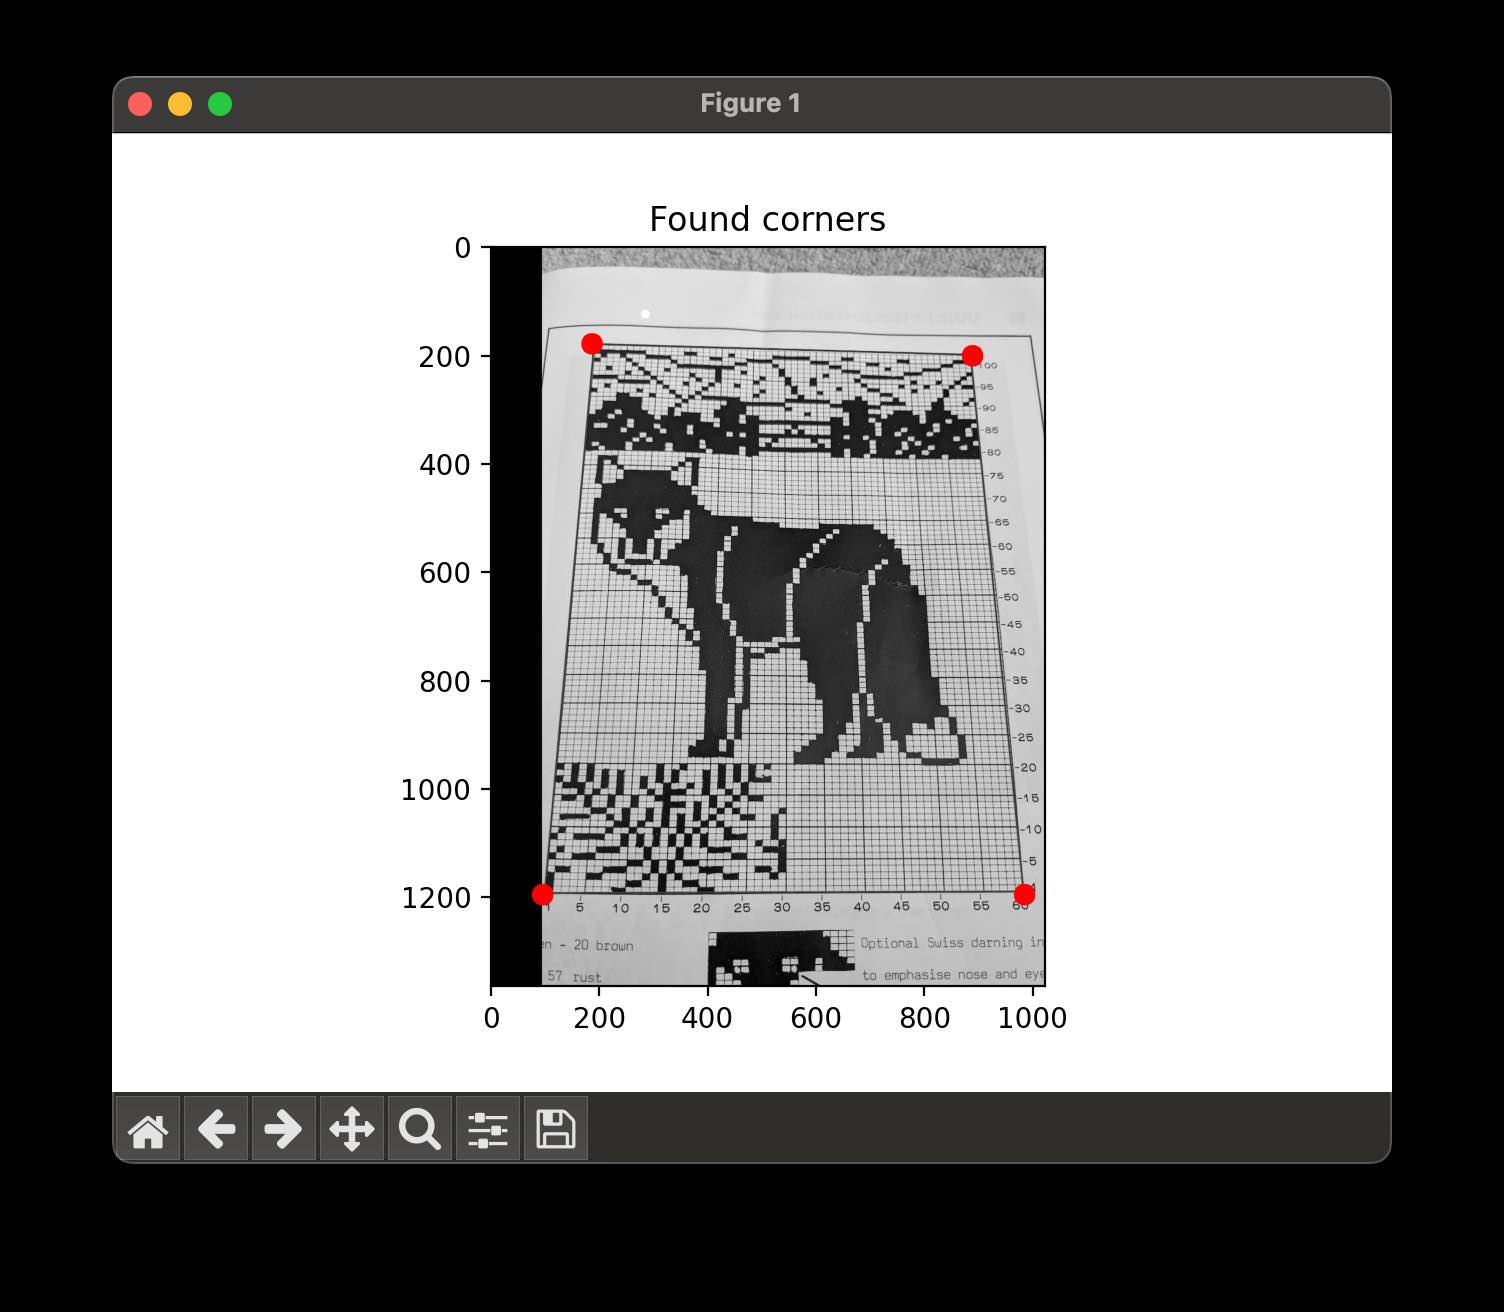
Step 2 - Straighten out the image.
The image above looks like it is a photograph of a book, and knitting machines can't read books.
I knew that linear algebra (a.k.a vectors and matrices) could transform an image by stretching and rotating it. This is just what's needed to correct dodgy camera angles. However, I hadn't paid quite enough attention in maths class to remember how exactly to do this.
Fortunately, a bunch of people who HAD paid attention in maths class have contributed to the OpenCV project. This contains many many algorithms for doing interesting things with assets. Even better, they have a tutorial.
The idea therefore is as follows:
- Use Pythagoras' theorem to find the lengths of the lines surrounding the image. From this look at the largest widths and heights to figure out the size of the image when straightened.
- Figure out how to rotate the image and to stretch it out to its new size. OpenCV has a getPerspectiveTransform function to do this. You give it pairs of points - original top left to new top left, original bottom right to new bottom right, etc - and it gives you a transform matrix.
- Use the transform matrix to map every pixel in the original space into the new space. Fortunately there is a warpPerspective function to do just that.
- Crop the image. Remove the rest of the page, leaving only the pattern.
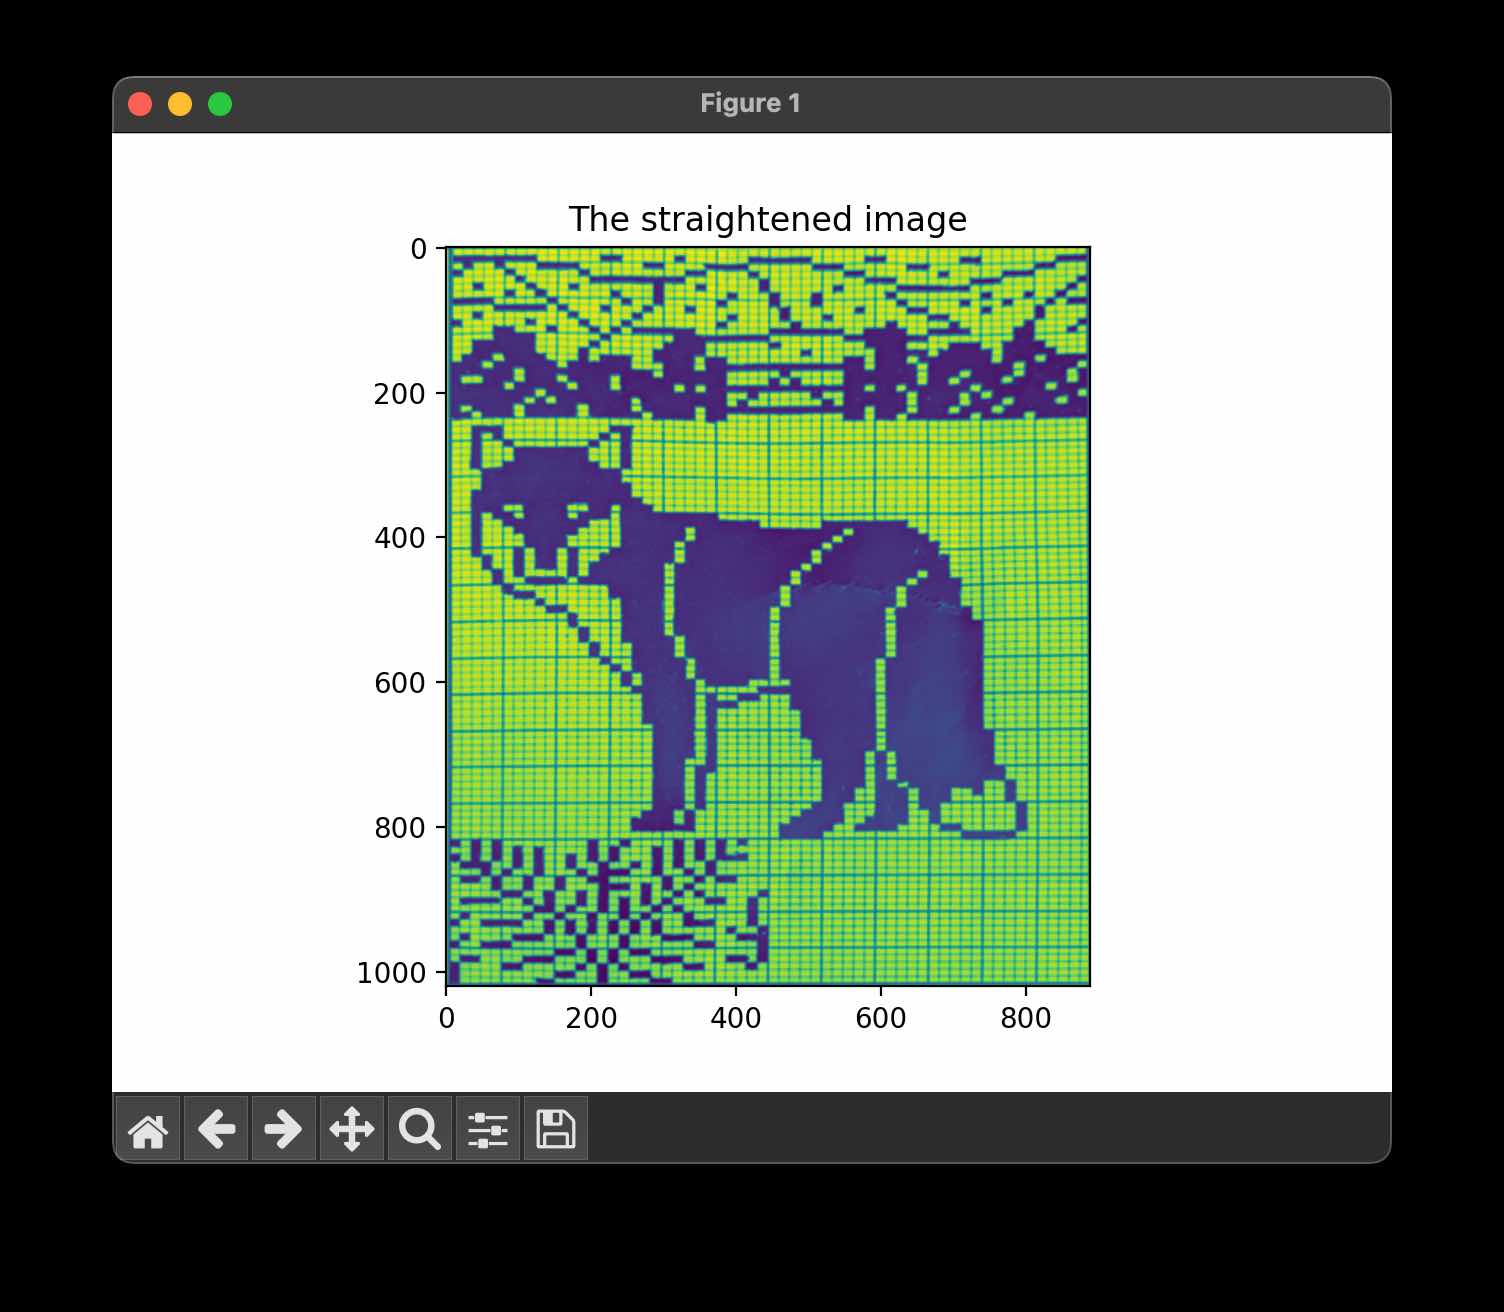
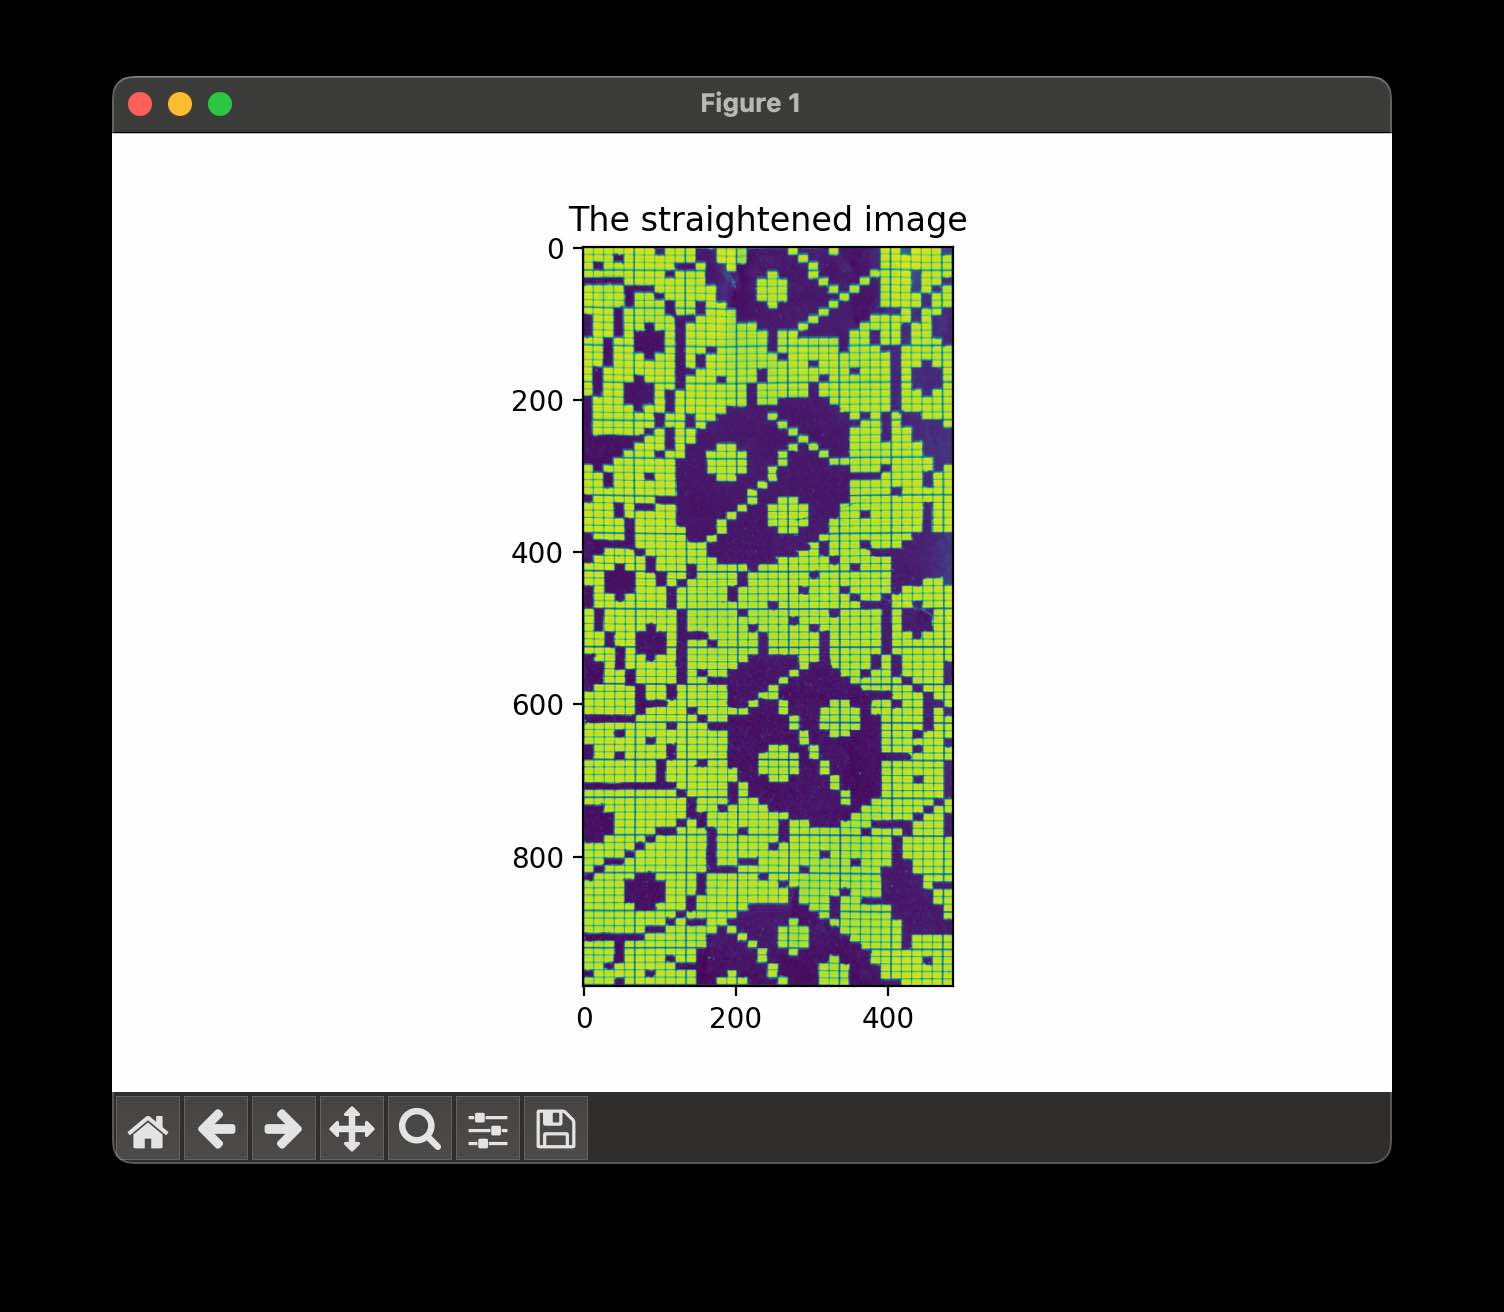
Step 3 - Produce the small PNG file
This image is now a lot closer to what we want. The photo doesn't look like it is of a page of a book, and the image is nice and straight. But just reducing the image size gives errors. I suspected these were due to the grid lines. Again, there are many ways of reducing this - but this was a quick project. So I decided to blur the image, with configurable blur. A bit of trial and error on the amount of blur seemed to get good results.
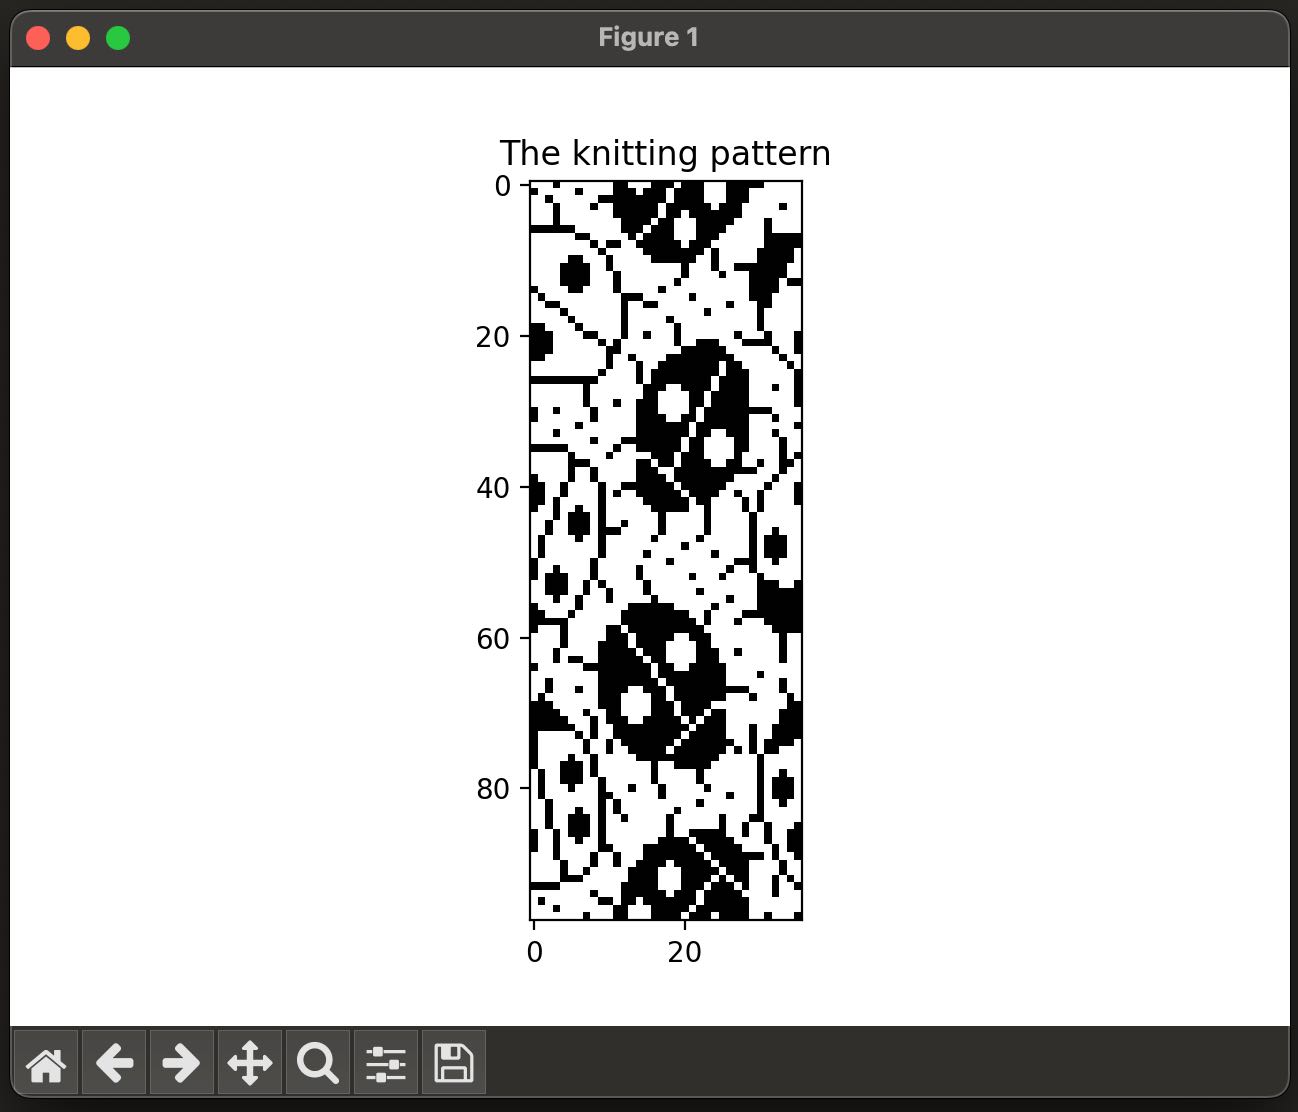
Step 4 - Profit!
With my bit done it was time to hand over to the knitting machine wrangler to see what came out. And success!
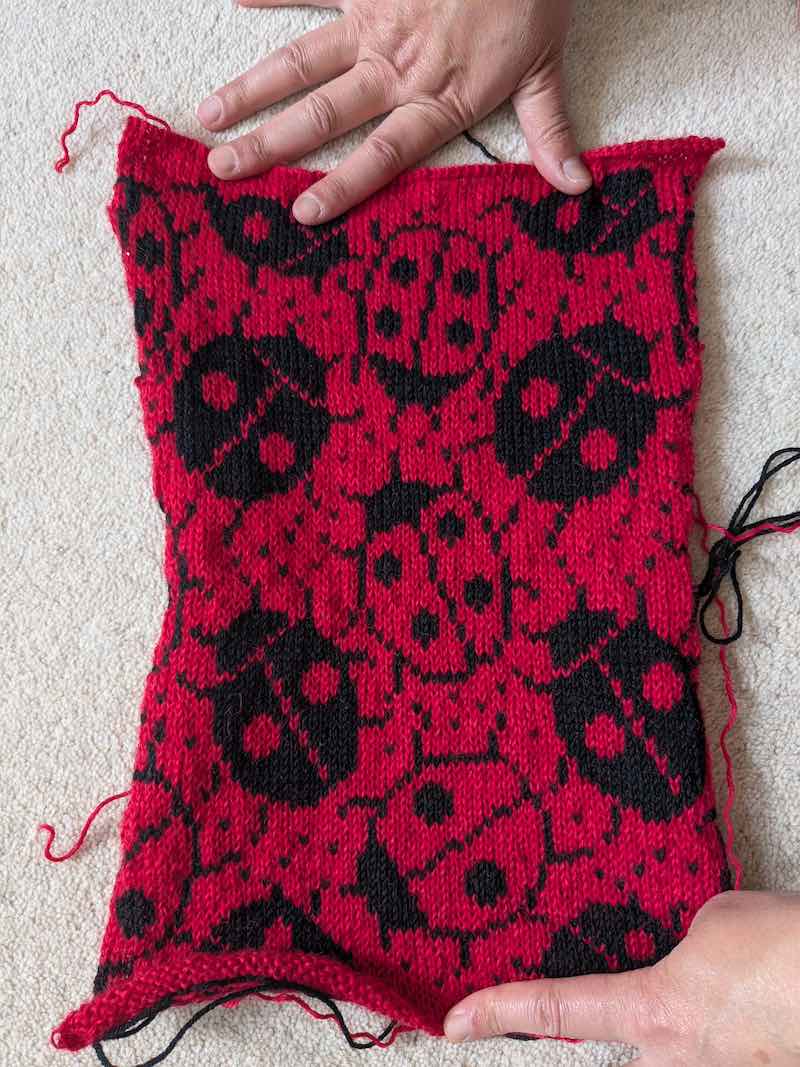
Next is to make a full jumper and for her to re-create the tantrum she had when she had to wear uniform instead of the jumper to school!
The code
The code is here, should it be useful to anyone. There are many ways it could be improved, so if someone fancies doing this then let me know!